Author: Neel Chauhan

  • Running WireGuard over HTTPS via Chisel, or how to bypass your hotel’s firewall

    Right now, I am visiting Amsterdam. While Amsterdam is a nice city and I like my hotel, one of the worst parts is the hotel’s Wi-Fi.

    The Wi-Fi is heavily firewalled. Meaning only mainstream TCP services are allowed. While SSH is allowed, Wireguard isn’t.

    But I discovered Chisel, which lets you proxy TCP or UDP over HTTP and WebSocket.

    So how do you run Chisel?

    Installation

    On a web server, download the latest version of Chisel.

    While most of you are going to run Debian or Ubuntu, I run Rocky Linux as a server so Chisel can be installed with a single dnf command:

    dnf install https://github.com/jpillora/chisel/releases/download/v1.11.8/chisel_1.11.8_linux_amd64.rpm

    You can also install it as a Docker container.

    Running Chisel as a Server

    Assuming you aren’t running Docker or Windows:

    chisel server --auth user:pass --port port --backend http://example.com

    Replace the following:

    • user with your desired username
    • pass with your desired password
    • port with the TCP port you want Chisel to listen on

    You can also set up a systemd service. I am lazy so I used tmux.

    I also recommend a reverse proxy. I use Caddy, so to do it, assuming you have the DNS name domain pointed to your server, add the following server block:

    domain {
      encode gzip
      reverse_proxy 127.0.0.1:port
    }

    Make sure port is the Chisel port, and then restart Caddy.

    If you use nginx or another reverse proxy, check the respective instructions.

    Running Chisel as a Client

    I am accessing Chisel on Fedora, so the dnf command also worked there.

    To run Chisel as a client, run the following in your terminal:

    chisel client --auth user:pass https://url local_port:remote_ip:remote_port/udp
    • user with your chosen username
    • pass with your chosen password
    • local_port with the UDP port you want to listen on locally
    • remote_ip with the remote IP you want to connect to
    • remote_port with the UDP port you want to connect to

    You can also remove /udp to connect via TCP.

    Conclusion

    It always sucks when the expensive hotel your family booked blocks most TCP/IP services. But the good thing about open source is that you can tunnel raw UDP and TCP inside HTTPS.

    Yes, China spends unlimited amounts of money on internet censorship. But for-profit hotels, workplaces, public libraries and ISPs who purposefully violate Net Neutrality cannot. And in the latter case, firewalling shouldn’t mean you shouldn’t be able to access your homelab.
  • Fedora Linux on an Asus Zenbook S14 UX5406AA

    I’ve been wanting a Linux Laptop with a good display for a while. For years my go-to option for non-Apple laptops was HP (mostly) but I got tired of the poor displays.

    I picked up an Asus Zenbook S14 UX5406AA today, since I wanted a good display and Best Buy was running a sale.

    I’m very impressed with the Zenbook: the hardware is way ahead of other high-end PC laptops I used; HP EliteBook/OmniBook/Spectre, Dell XPS and Lenovo ThinkPad (yes, ThinkPads are actually unreliable).

    However, to no surprise the Asus Zenbook has out-of-the-box issues with Fedora, and probably other Linux distros. It can be worked around if you don’t mind using Fedora 45 beta as of August 2026.

    Brightness

    By default, the brightness runs at 100%. This can be solved using grubby:

    grubby --update-kernel=ALL --args="xe.enable_dpcd_backlight=1"

    This makes the brightness works out-of-the-box.

    If you’re running a non-Red Hat-based Linux distribution (i.e. Arch, Ubuntu) the commands are different.

    Audio

    Audio also doesn’t work out-of-the-box on Fedora 44, even with the latest packaged kernel. This is because there’s a “ghost” Realtek audio codec when the real HD Audio codec is Cirrus Logic.

    Audio works after working to Fedora 45 beta with Kernel 7.2. Although I normally use Sony Bluetooth earbuds.

    Wi-Fi and Bluetooth

    Wi-Fi and Bluetooth should work fine.

    Suspend and Resume

    Suspend and resume should work fine once Fast Boot is disabled in the UEFI setup.

    Conclusion

    While it’s not as good out-of-the-box as a ThinkPad, XPS or even HP models (although this is current-gen hardware), the Zenbook UX5406AA is a refreshing change from other x86 laptops hardware-wise.

    Interestingly, older HP Spectre models didn’t have working suspend-and-resume but the Zenbook does (well, after disabling Fast Boot).

    I’ve wanted a Linux laptop I actually enjoy using. Yes, Apple Silicon is great. But I was longing for premium Linux hardware. I’m not the biggest fan of macOS, maybe unless the other option is meh hardware. And considering Asahi’s delays I’m not going to use Apple M2; I like new hardware. Well, as long as I don’t get ripped off by SK Hynix.

    Asus also did one thing right over Apple: The Zenbook has better oleophobic coating than MacBooks. The same can also be said about HP, though HP has poor displays versus Apple and Asus.

  • Installing Codecs on Rocky Linux 10 and Firefox

    How do you install codecs on Rocky Linux 10.

    First, install RPM Fusion. The instructions are on their website.

    Next, enable CRB:

    sudo dnf config-manager --enable crb

    Now, install the codecs via dnf:

    sudo dnf groupupdate core
    sudo dnf groupupdate multimedia --setop="install_weak_deps=False" --exclude=PackageKit-gstreamer-plugin
    sudo dnf groupupdate sound-and-video

    After that, the codecs should work on Firefox:

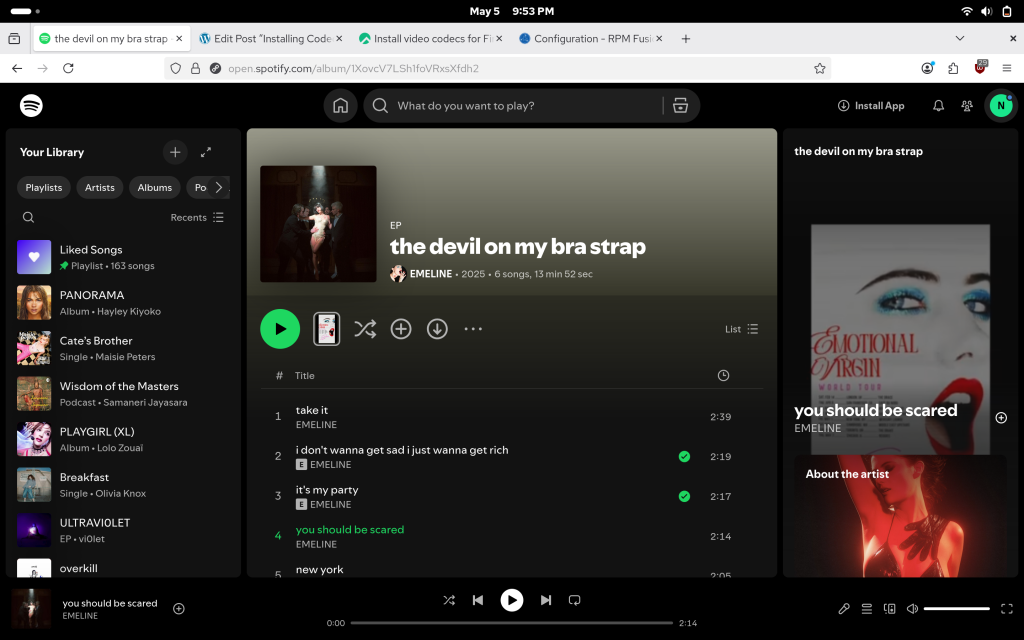
    A screenshot of Rocky Linux 10 and Firefox playing Spotify via RPM Fusion cocecs. More specifically, Emeline's song 'you should be scared'.
  • How I recovered from Mastodon/Fediverse (actually Akkoma) database corruption

    I moved domains again, this time from sour.coffee to momandpop.network. I also run Fediverse servers.

    Why so quickly? In the typical AuDHD fashion, I didn’t like sour.coffee too much.

    I run a VPS host for a living, and have two VPSes running not-Tor exit relays: one running my legacy neelc.org domain (running Rocky Linux 9) and one running the newer domains (running Rocky Linux 10).

    I decided to “migrate” to momandpop.network by setting up Akkoma on the “legacy” VPS via Docker. Initially, it went smoothly. Well, until I wanted to migrate to the non-legacy VPS.

    What did I encounter?

    db-1      | chmod: /var/run/postgresql: Operation not permitted
    db-1      | 
    db-1      | PostgreSQL Database directory appears to contain a database; Skipping initialization
    db-1      | 
    db-1      | 2026-04-05 22:03:26.747 UTC [1] LOG:  starting PostgreSQL 14.22 on x86_64-pc-linux-musl, compiled by gcc (Alpine 15.2.0) 15.2.0, 64-bit
    db-1      | 2026-04-05 22:03:26.747 UTC [1] LOG:  listening on IPv4 address "0.0.0.0", port 5432
    db-1      | 2026-04-05 22:03:26.747 UTC [1] LOG:  listening on IPv6 address "::", port 5432
    db-1      | 2026-04-05 22:03:26.748 UTC [1] LOG:  listening on Unix socket "/var/run/postgresql/.s.PGSQL.5432"
    db-1      | 2026-04-05 22:03:26.750 UTC [14] LOG:  database system was shut down at 2026-04-05 20:33:08 UTC
    db-1      | 2026-04-05 22:03:26.750 UTC [14] LOG:  invalid magic number 0000 in log segment 000000010000000000000001, offset 0
    db-1      | 2026-04-05 22:03:26.750 UTC [14] LOG:  invalid primary checkpoint record
    db-1      | 2026-04-05 22:03:26.750 UTC [14] PANIC:  could not locate a valid checkpoint record
    db-1      | 2026-04-05 22:03:26.914 UTC [1] LOG:  startup process (PID 14) was terminated by signal 6: Aborted
    db-1      | 2026-04-05 22:03:26.914 UTC [1] LOG:  aborting startup due to startup process failure
    db-1      | 2026-04-05 22:03:26.921 UTC [1] LOG:  database system is shut down

    In short, database corruption.

    While typically you could run pg_resorewal. But when I tried that, it left Postgres in a non-operable state.

    I’m just grateful that

    • The signing keys weren’t lost
    • If you have signing keys, your “followers” will re-sync
    • Nothing of significance was posted to Fedi from my “new server”

    The second point is how some Mastodon administrators migrated to GoToSocial. I in fact initially used GTS before migrating to Akkoma.

    I had a feeling this would eventually happen, but at least it didn’t happen on an “established” server. I’m not a Postgres fan myself, I actually prefer plain-old MariaDB/MySQL.

    And if you want to follow me on Fedi/Mastodon, I’m @noc@momandpop.network.

  • Doing VLAN trunk and access ports on MikroTik CRS/RouterOS

    Most of the switches in my homelab are MikroTik CRS switches, although I am getting a UniFi PoE switch (MikroTik didn’t make a 2.5G PoE switch, that’s why).

    I use two CRS304-4XG-IN switches to connect desktop computers to the 10G LAN, but wanted my desktops on a separate VLAN.

    On my network, I use VLAN 4 for desktops.

    The configuration you need is:

    /interface bridge
    add admin-mac=XX:XX:XX:XX:XX:XX auto-mac=no name=bridge vlan-filtering=yes
    /interface bridge port
    add bridge=bridge comment=defconf interface=ether1
    add bridge=bridge comment=defconf interface=ether2 pvid=4
    add bridge=bridge comment=defconf interface=ether3 pvid=4
    add bridge=bridge comment=defconf interface=ether4 pvid=4
    add bridge=bridge comment=defconf interface=ether5
    /interface bridge vlan
    add bridge=bridge tagged=ether1 untagged=ether2,ether3,ether4 vlan-ids=4

    The bold parts are important, and I will explain what they are:

    • vlan-filtering=yes in the /interface bridge means you will filter for VLANs. This is required for VLAN trunk/access ports.
    • pvid=4 in the /interface bridge port means the specific port will use VLAN 4.
    • tagged=ether1 in the /interface bridge vlan means the trunk/tagged port is ether1.
    • untagged=ether2,ether3,ether4 means the ether2-4 ports are access ports
    • vlan-ids=4 means we are establishing a bridge on VLAN 4.

    Hopefully, this helps you set up VLAN trunking on a MikroTik CRS/RouterOS switch.

  • Running WPA3-Enterprise in my home network

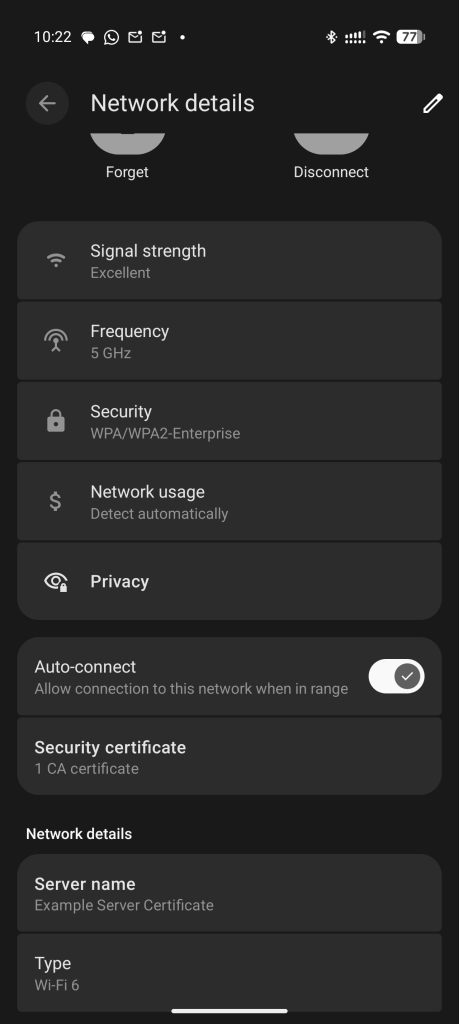
    It’s no secret that by now, most home networks use WPA-Personal. Why? It’s a simple password. This included mine. Well, until today.

    I always wanted to try WPA3-Enterprise in my home network, at least on the SSID/VLAN for my devices (versus the rest of my family). The roadblock was FreeRADIUS not working with Samba and MS-CHAPv2, it was a permissions issue (I don’t want to pirate Windows Server).

    So here’s me connected to my WPA-Enterprise on my phone:

    Why?

    While I know the reasons for WPA3-Enterprise in an office network, it seems overkill for a home network. So why do it?

    Because I can.

    It’s easy enough to do on a Incus UniFi controller. After all, I have a cluster of MikroTik 10G equipment when I could just rent an ISP-provided router and extender like a Joe and focus on “AI” instead.

    Well, I’m done.

  • Cloning a Calix GPON ONT or Quantum Fiber SmartNID

    WARNING: This guide is for instructional purposes only. I am not responsible for any damages caused by this guide. This guide may violate your ISP’s terms of service and is possibly illegal. Proceed at your own risk. I also no longer live in CenturyLink/Quantum territory.

    While I now live in Verizon territory (and lack Verizon FiOS at the moment), when I lived in Seattle and got CenturyLink Fiber (now Quantum Fiber), I initially had an issue which looked like “latency spikes and packet loss”.

    Little did I know that the ONT (Optical Netowrk Terminal) given, a Calix 716GE-I R2 has a hard cap of 16384 TCP sessions, not unlike AT&T Fiber/U-verse routers. Even lesser known is that it’s very easy to clone Calix ONTs with just a JTAG cable and the Calix 803G doesn’t have the issue.

    CenturyLink Fiber then got rebranded as Quantum Fiber which uses SmartNIDs and DHCP, and then sold to AT&T. However, I had a CenturyLink-branded service with a Calix ONT at the time and moved eastwards before I could be switched over.

    Note: This is not for AT&T Fiber itself using a Nokia ONT or BGW320/BGW620. I never had AT&T Fiber, outside of Frontier FiberOptic GPON in Connecticut for a few months which inherited 802.1X from AT&T. Check the 8311 Discord server for AT&T Fiber proper.

    So you want to clone your ONT?

    Pre-requisites

    You need the following devices information:

    • Original, ISP-provided Calix ONT or SmartNID with the ONU MAC and FSAN Serial ready
    • If required, your GPON Password. CenturyLink/Quantum doesn’t use this
    • Calix ONT being cloned to
    • JTAG serial adapter

    About the JTAG adapter, the CP2102 models are recommended. Other models have had issues with Calix’s JTAG console.

    Cloning the ONT

    Now for the fun part.

    First off, you need to open your ONT.

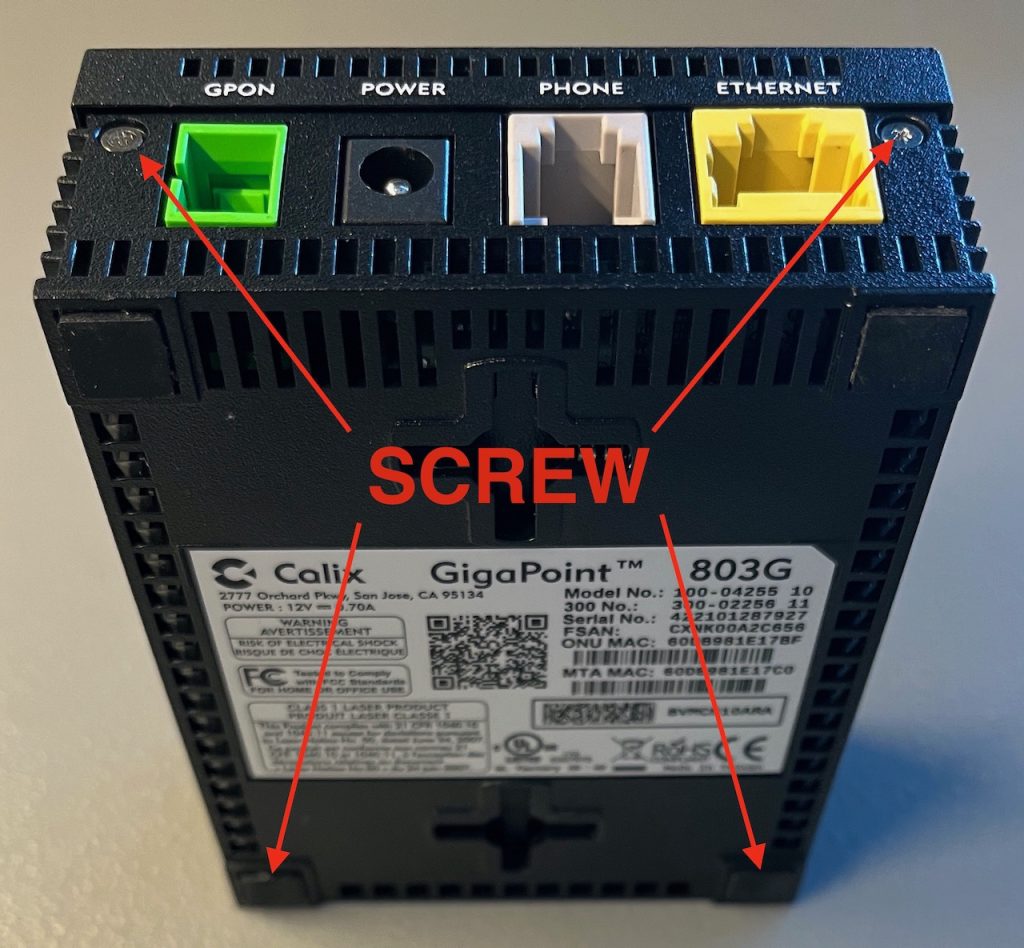
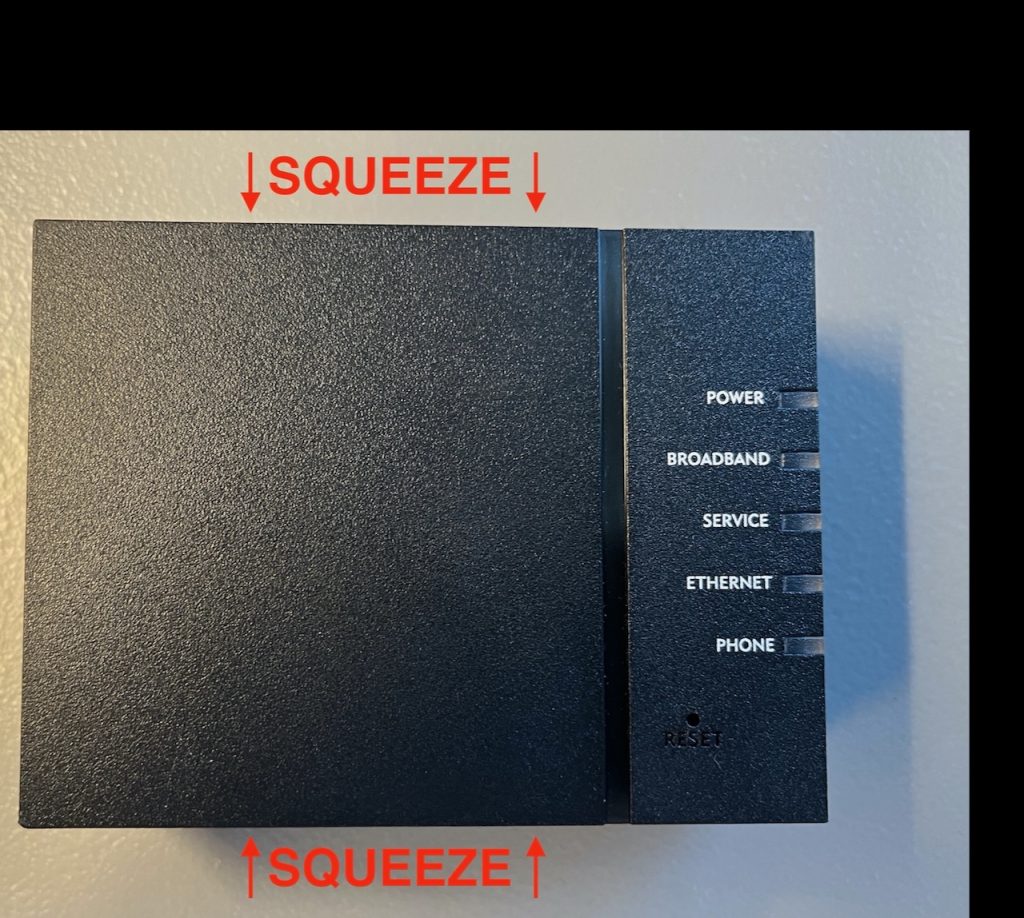
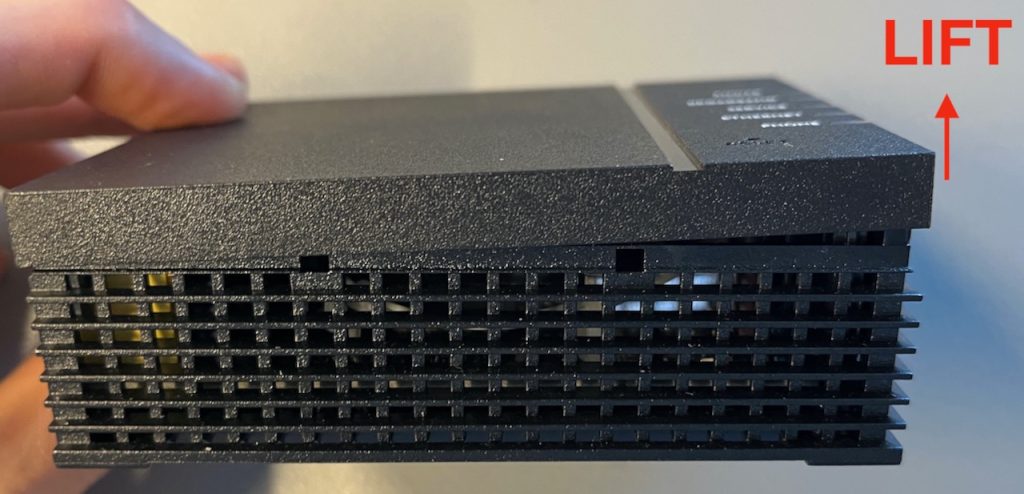
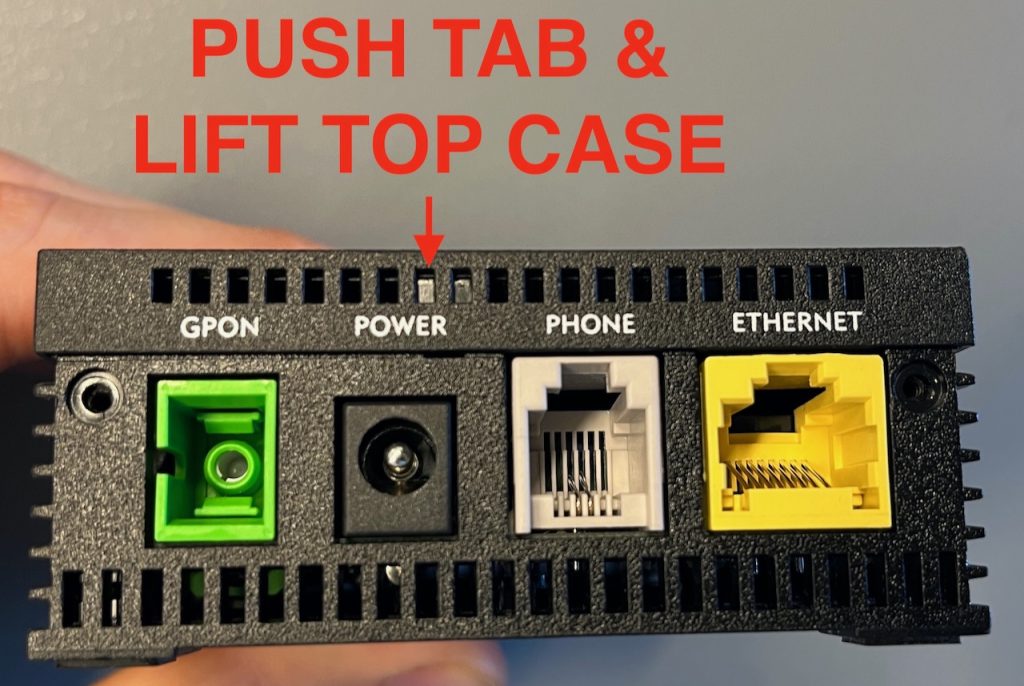
    For the 803G (the destination ONT), these images should be self-explanatory.

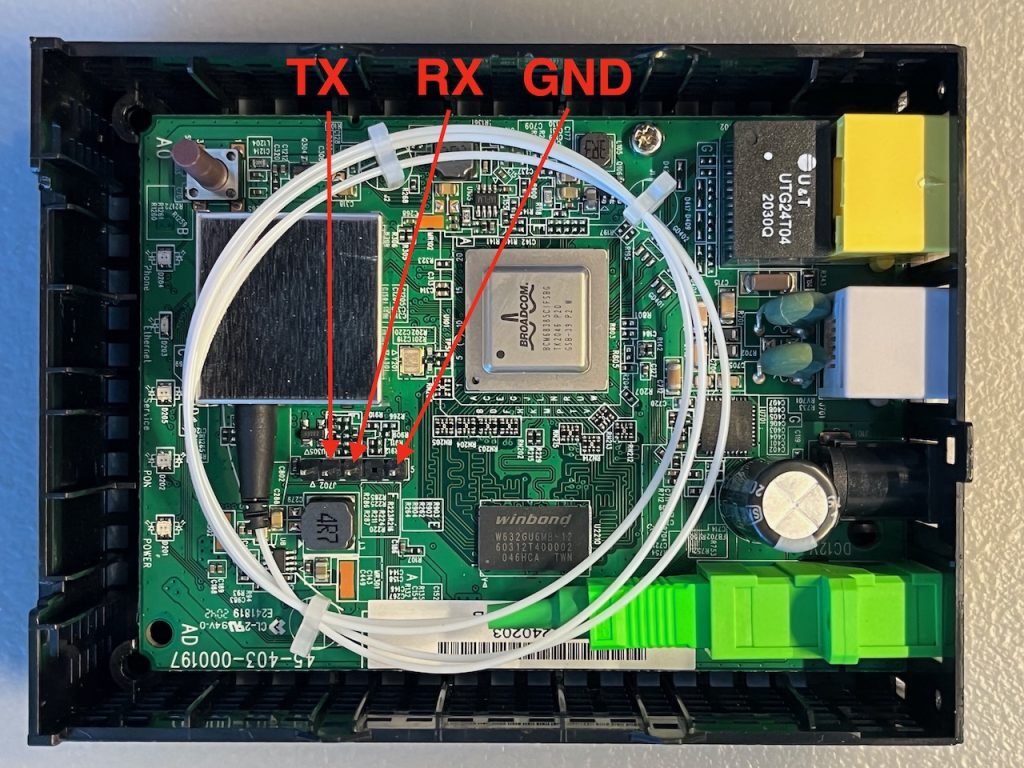
    When you are inside, connect the JTAG.

    Note: The TX should go to your JTAG RX and vice-versa.

    Image source: fire-foo.com.

    When you connected your JTAG header pins, open a serial console (e.g. cu or PuTTY), plug in the power while hitting ESC on your keyboard repeatedly.

    When you are on the CFE> prompt, type b and press enter.

    Press enter for most of the values, except the Base MAC Address and GPON Serial Number which should be the ONU MAC and FSAN Serial respectively from your source ONT.

    Some ISPs may need a GPON password, but CenturyLink/Quantum does not. I do now know how to get the GPON password as I was never in that scenario.

    Once you are done, wait for the ONT to boot successfully, then turn off the power, close the ONT, and plug the fiber and power in place of your stock Calix ONT.

    An example of a JTAG session can be seen here.

  • An ARM Homelab Server, or a Minisforum MS-R1 Review

    I’ve always wanted an ARM server in my homelab. But earlier, I either had to use an underpowered ARM system, or use Asahi which not only requires expensive Mac hardware but also slowed down in the past few years.

    Then Minisforum introduced the MS-R1 Mini PC. Two MS-01s were already incumbent in my homelab when they replaced power-hungry HPE towers, but the MS-R1 gave me what I wanted: a reasonably powerful ARM machine which doesn’t have bank-breaking Mac pricing.

    Assembly

    I got the MS-R1 barebones and had a 1TB SSD sitting around.

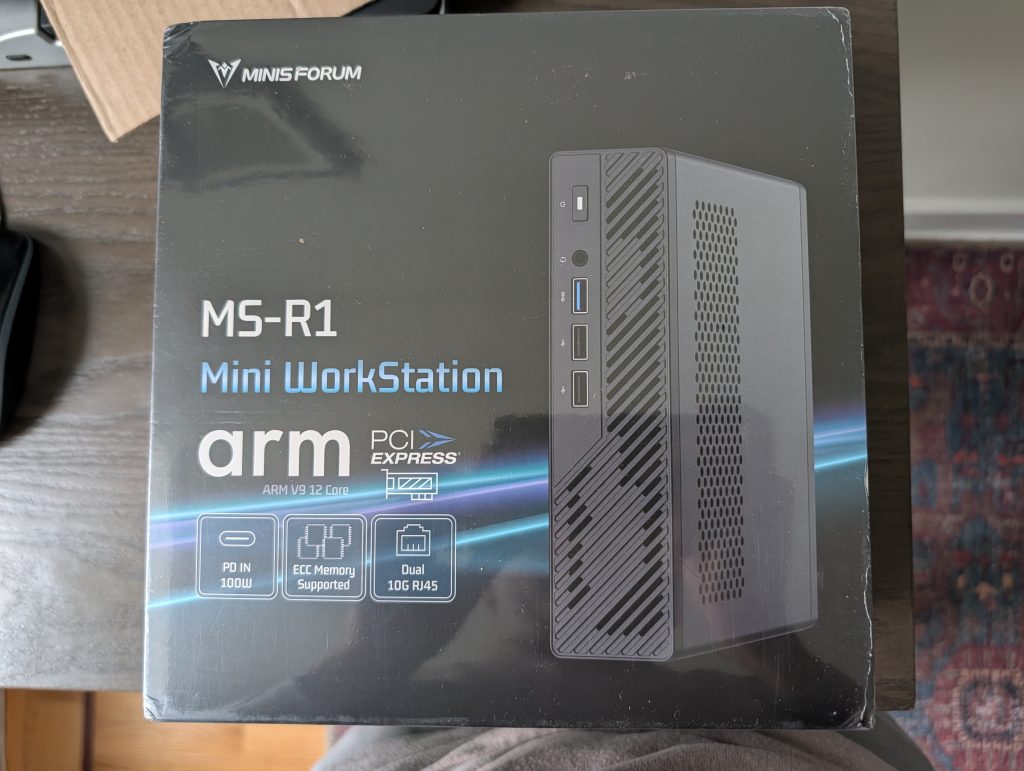
    First, we have the box:

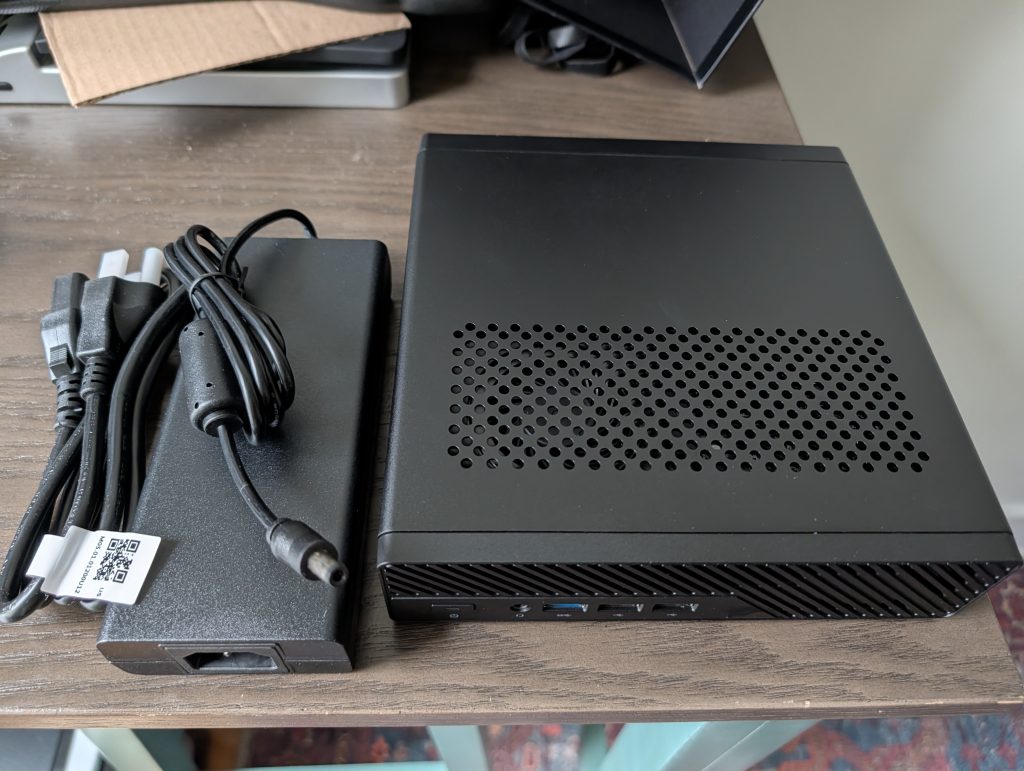
    I opened the box and got this:

    I installed my SSD, and attempted to install Rocky Linux.

    Rocky Linux Installation

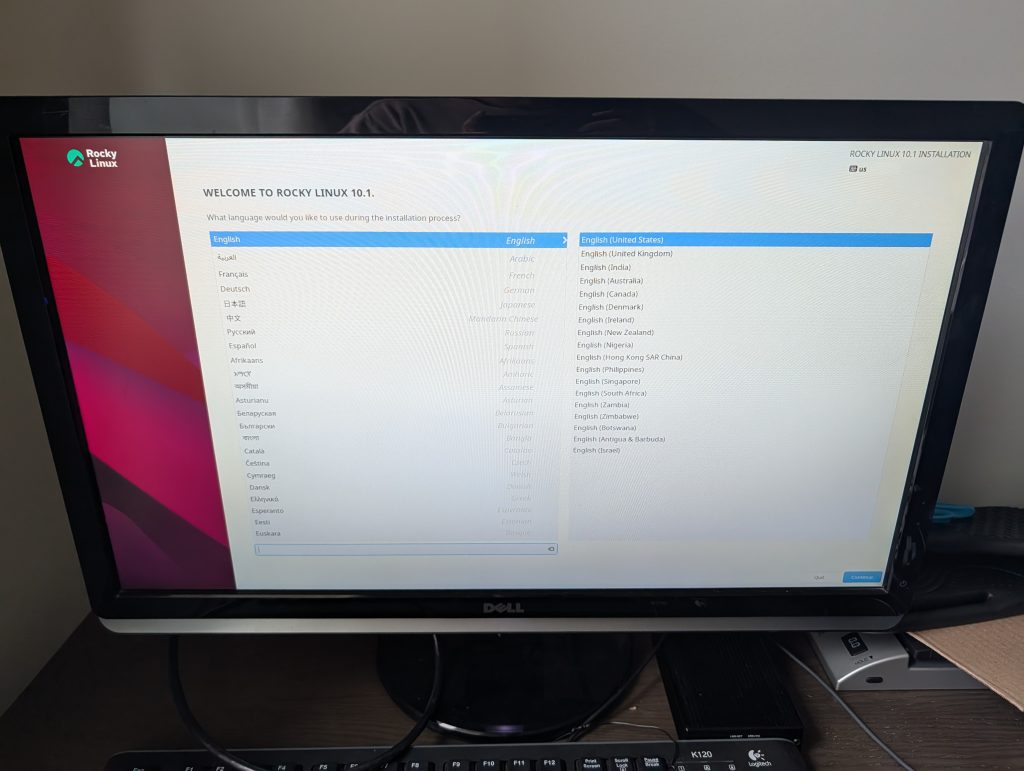
    So here it is, Rocky Linux booted.

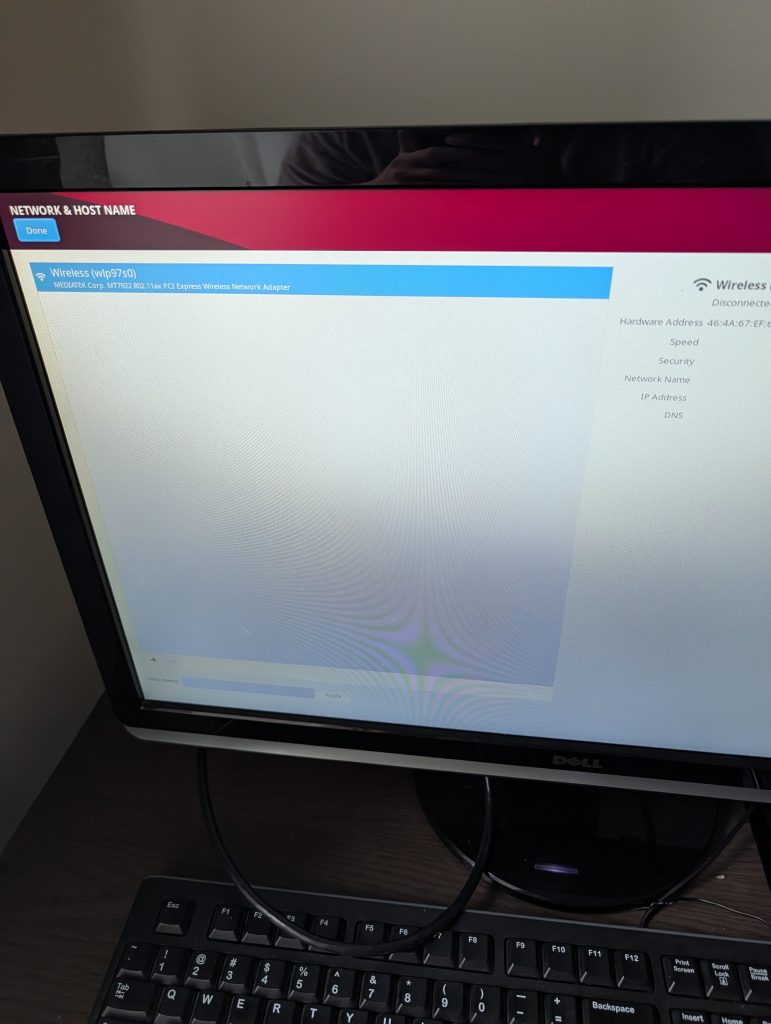
    There’s one issue: the onboard NICs weren’t detected:

    I installed it anyways, and tried to sideload the Realtek r8127 drivers. While they did install and load, keeping the driver upon kernel updates wasn’t elegant and very hacky.

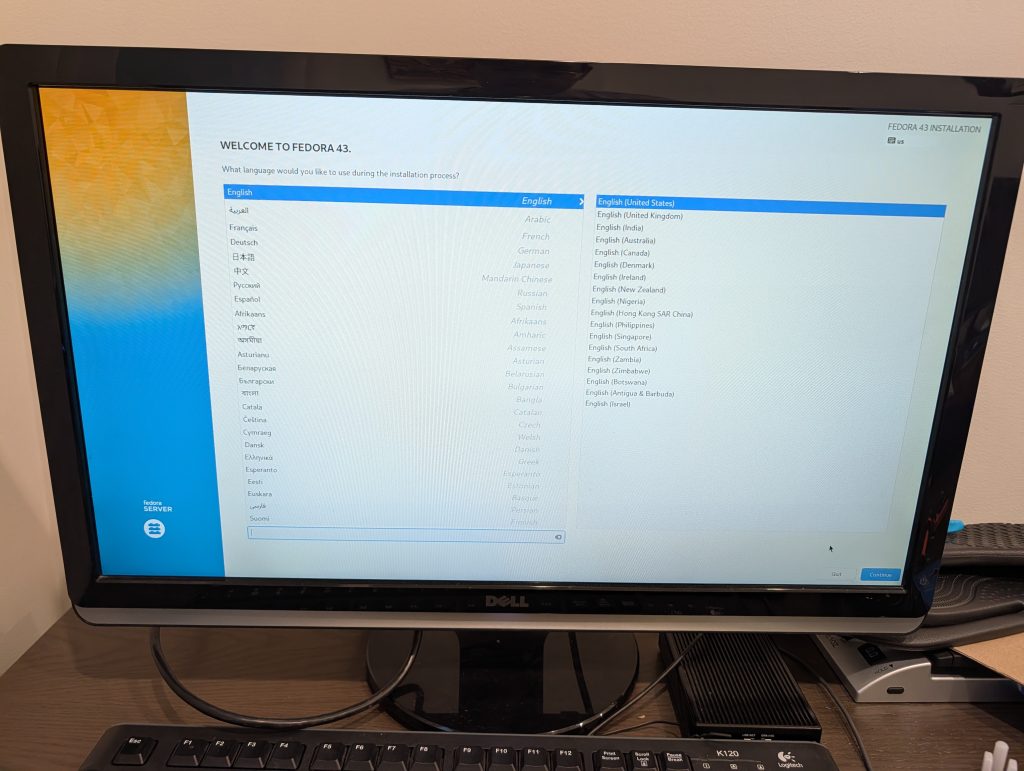
    I could keep trying, but decided to just use Fedora instead:

    Fedora Installation

    Yes, while I use Fedora on my laptop, I also know Fedora is generally not a good option for a server. But it had the NIC drivers as the RTL8127 is newer than RHEL 10’s freeze but not Fedora 43’s.

    So that’s what I used.

    Homelab Picture

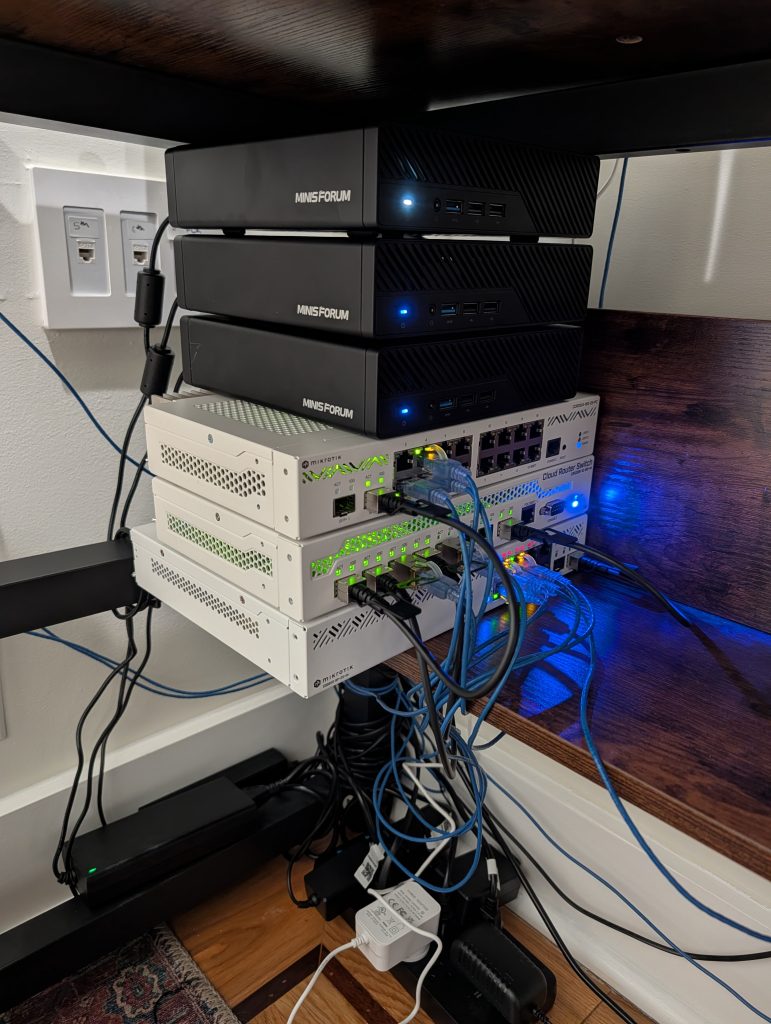
    Here’s my obligatory homelab picture:

    MS-R1 on the top, then two MS-01s, MikroTik CCR2004-16G-2S+PC, CRS309-1G-8S+IN and CSS610-8P-2S+IN.

    The Upsides

    First, it’s a powerful-enough ARM system which doesn’t break the bank. I wanted this for so long. I’d say it’s quieter than the MS-01s but then Intel doesn’t exactly have the most efficient silicon. Yet even as an efficiency for performance freak I have a 285K instead of a 9950X.

    While Minisforum recommends their Debian image, Rocky Linux worked for everything but the NICs, and Fedora works for everything I need. I haven’t tested the integrated GPU since I plan to use this headless. I also own a Mac as my ARM (but not main) laptop.

    Say what you want about UEFI and ACPI, but it does make hardware support easier. Heck, not just Macs with UTM, but Huawei ARM laptops in China can run Windows VMs, despite crippling US sanctions.

    I do hope a future CentOS/RHEL/Rocky 10 adds the Realtek 8127 so I won’t have to wait until 2028 for Rocky 11. And no I won’t use Debian.

    The Downsides

    By no means is the MS-R1 perfect.

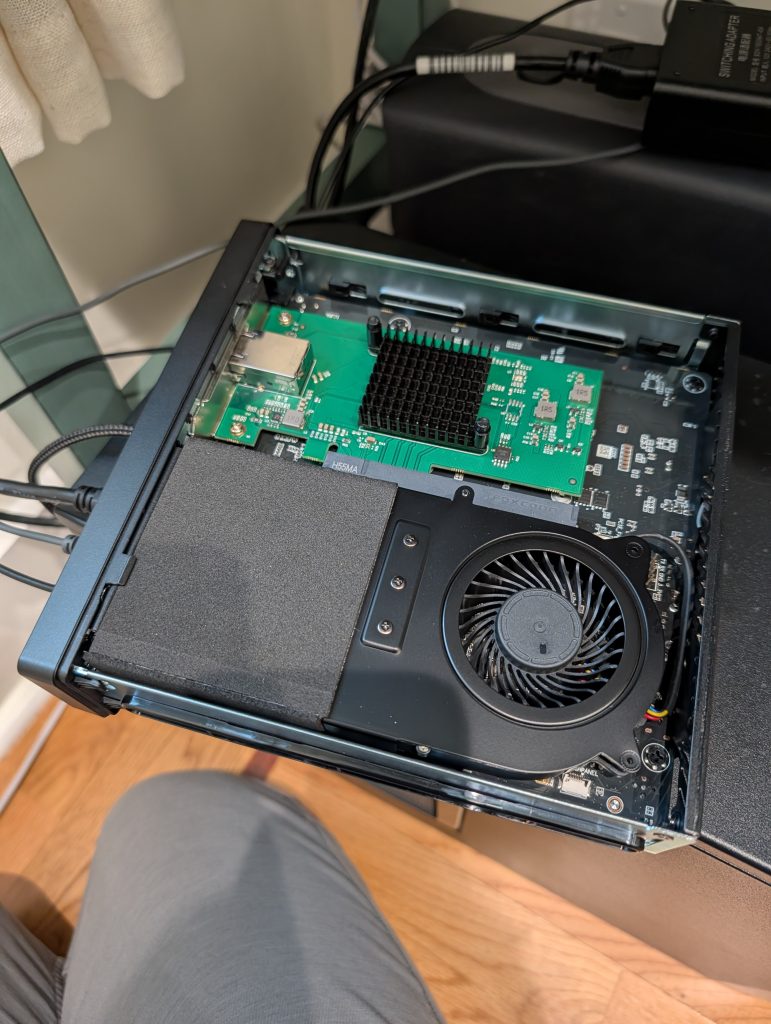
    For instance, there are two M.2 slots but one is used by the Wi-Fi and even if I remove it, cannot use it for a M.2 SSD, only U.2. I’d still prefer to have RAID if not for the shortage. The MS-01 and A2 have multiple M.2 SSD slots.

    Also, Marvell AQC107 NICs wasn’t detected by the UEFI, so they couldn’t be used as far as I tried:

    Unless the NIC died or my UEFI configuration is wrong, it’s simply not usable.

    One nit: if I select “power on after outage,” it didn’t do it when I unplugged and replugged the server. Darn.

    EDIT: Apparently if I want auto power on, it’s a physical switch. Minisforum support told me this, so I flipped it and now it works great.

    Why not Debian or Ubuntu?

    While I’m aware there’s a “recommended” Debian variant for the MS-R1, I’m simply not a fan of Debian-based distros. Sure, I run my UniFi controller on Debian (inside Incus). But that’s because I have to, not because I want to.

    I don’t hate Debian, I respect Debian for what they do. They do many things right, like being truly community-owned and having a reliable upgrade path (which RHEL and co notoriously lacks). But it’s not for me, despite having used it for 2.5 months before nearly a decade of FreeBSD.

    Conclusion

    The ARM ecosystem while growing is still small when compared to x86. Heck, I daily drive an HP OmniBook Ultra instead of a faster M3 Pro MacBook Pro because of Linux. And Asahi’s delays.

    The MS-R1 isn’t perfect, but works quite well as a homelab ARM hypervisor. Do I regret it? Not at all, despite its problems. It’s early adopter problems, but I have pretty thick skin as long as my privacy isn’t invaded for profit and “AI”.

    The Mac Studio is way too expensive, even used, while expected for Apple is more expensive than even already expensive current-gen HPE ProLiants. HPE is cheaper than Apple, and is already expensive as-is. ARM64 SBCs are great, but I still wanted something like a PC.

    There is also one other perk: while the MSRP is $599, I got it for $559 despite a RAM shortage.

    While it won’t replace my two MS-01s (too much x86 software! vPro!), it’s a nice addition and is already running my secondary Samba domain controller in a FreeBSD 15.0 virtual machine.

  • Rocky Linux/RHEL 10: Fixing “Invalid UID in persistent keyring name” with AD and SSSD

    I run a Samba Active Directory in my homelab, with a Wireguard VPN to my dad’s house between my and his MikroTik routers.

    I recently reinstated the HPE ProLiant ML30 Gen9 running Rocky Linux 10 colocated at his house. With that, I rejoined the server to a new AD domain I made. I wasn’t able to log in, since the SSSD cache doesn’t get flushed.

    While I used this guide on Rocky Linux, it should be the same on AlmaLinux, CentOS or RHEL.

    Going back, the error I got was:

    Feb 13 15:11:01 oldsai.sc.lan krb5_child[2258]: Invalid UID in persistent keyring name
    Feb 13 15:11:01 oldsai.sc.lan sshd-session[2254]: pam_sss(sshd:auth): authentication failure; logname= uid=0 euid=0 tty=ssh ruser= rhost=::1 user=blackbird
    Feb 13 15:11:01 oldsai.sc.lan sshd-session[2254]: pam_sss(sshd:auth): received for user blackbird: 4 (System error)

    To fix this, first stop sssd:

    systemctl stop sssd

    Clear the cache with sss_cache:

    sss_cache -E

    Now remove the stray cache files:

    /var/lib/sss/db/*

    Note: this command is important, as SSSD doesn’t flush caches upon unjoining and rejoining, even with different user IDs.

    Now start sssd:

    systemctl start sssd

    The error should go away. Keep in mind that if UIDs changed for a particular user, you will need to delete or chown their home directory.

    Source. Thanks, Jarrod Farncomb.

  • Creating a Samba Active Directory Domain Controller on FreeBSD

    While I now use Fedora as my main desktop and Rocky Linux as my server OS, there are some things which aren’t in the EPEL. That combined with me not having really used Debian since high school means I set up homelab Samba domain controllers on FreeBSD.

    To set one up, you need a static IPv4 address, and a static IPv6 address if your network is dual-stack. You’ll also need to forward your domain’s DNS zone or set the DC as the DNS server, which is out of the scope for this article.

    When you’re ready, if your DC uses UFS (versus ZFS), you’ll first need to edit /etc/fstab:

    /dev/vtbd0s1a / ufs rw,acls 1 1

    Note, you need the ,acls in order to run a Samba DC, as Samba requires this.

    If you haven’t rebooted, run this:

    mount -a

    Now, install Samba:

    pkg install samba422

    Note: newer versions of Samba may have come out. At the time of posting it’s samba422.

    Next, create the domain:

    samba-tool domain provision --use-rfc2307 --realm=SC.LAN --domain=SC --server-role=dc --dns-backend=SAMBA_INTERNAL --adminpass=PASSWORD

    Replace SC.LAN with the DC’s realm, and SC with the domain’s NetBIOS name.

    Then, enable samba_server and winbindd:

    sysrc samba_server_enable=YES
    sysrc winbindd_enable=YES

    Now, enable Samba:

    service samba_server start

    Keep in mind you’ll need your DNS server set to the AD DC’s static IP, or forward DNS zones. I use a MikroTIk core router, and forward DNS there.

    If your DNS server or forwarding is set, check if you can resolve it:

    # host sc.lan
    sc.lan has address 172.20.0.6
    sc.lan has IPv6 address 2602:XXX:2::6
    #

    Now, you can add users and groups, and join client machines.