Category: Network

  • Running WireGuard over HTTPS via Chisel, or how to bypass your hotel’s firewall

    Right now, I am visiting Amsterdam. While Amsterdam is a nice city and I like my hotel, one of the worst parts is the hotel’s Wi-Fi.

    The Wi-Fi is heavily firewalled. Meaning only mainstream TCP services are allowed. While SSH is allowed, Wireguard isn’t.

    But I discovered Chisel, which lets you proxy TCP or UDP over HTTP and WebSocket.

    So how do you run Chisel?

    Installation

    On a web server, download the latest version of Chisel.

    While most of you are going to run Debian or Ubuntu, I run Rocky Linux as a server so Chisel can be installed with a single dnf command:

    dnf install https://github.com/jpillora/chisel/releases/download/v1.11.8/chisel_1.11.8_linux_amd64.rpm

    You can also install it as a Docker container.

    Running Chisel as a Server

    Assuming you aren’t running Docker or Windows:

    chisel server --auth user:pass --port port --backend http://example.com

    Replace the following:

    • user with your desired username
    • pass with your desired password
    • port with the TCP port you want Chisel to listen on

    You can also set up a systemd service. I am lazy so I used tmux.

    I also recommend a reverse proxy. I use Caddy, so to do it, assuming you have the DNS name domain pointed to your server, add the following server block:

    domain {
      encode gzip
      reverse_proxy 127.0.0.1:port
    }

    Make sure port is the Chisel port, and then restart Caddy.

    If you use nginx or another reverse proxy, check the respective instructions.

    Running Chisel as a Client

    I am accessing Chisel on Fedora, so the dnf command also worked there.

    To run Chisel as a client, run the following in your terminal:

    chisel client --auth user:pass https://url local_port:remote_ip:remote_port/udp
    • user with your chosen username
    • pass with your chosen password
    • local_port with the UDP port you want to listen on locally
    • remote_ip with the remote IP you want to connect to
    • remote_port with the UDP port you want to connect to

    You can also remove /udp to connect via TCP.

    Conclusion

    It always sucks when the expensive hotel your family booked blocks most TCP/IP services. But the good thing about open source is that you can tunnel raw UDP and TCP inside HTTPS.

    Yes, China spends unlimited amounts of money on internet censorship. But for-profit hotels, workplaces, public libraries and ISPs who purposefully violate Net Neutrality cannot. And in the latter case, firewalling shouldn’t mean you shouldn’t be able to access your homelab.
  • Doing VLAN trunk and access ports on MikroTik CRS/RouterOS

    Most of the switches in my homelab are MikroTik CRS switches, although I am getting a UniFi PoE switch (MikroTik didn’t make a 2.5G PoE switch, that’s why).

    I use two CRS304-4XG-IN switches to connect desktop computers to the 10G LAN, but wanted my desktops on a separate VLAN.

    On my network, I use VLAN 4 for desktops.

    The configuration you need is:

    /interface bridge
    add admin-mac=XX:XX:XX:XX:XX:XX auto-mac=no name=bridge vlan-filtering=yes
    /interface bridge port
    add bridge=bridge comment=defconf interface=ether1
    add bridge=bridge comment=defconf interface=ether2 pvid=4
    add bridge=bridge comment=defconf interface=ether3 pvid=4
    add bridge=bridge comment=defconf interface=ether4 pvid=4
    add bridge=bridge comment=defconf interface=ether5
    /interface bridge vlan
    add bridge=bridge tagged=ether1 untagged=ether2,ether3,ether4 vlan-ids=4

    The bold parts are important, and I will explain what they are:

    • vlan-filtering=yes in the /interface bridge means you will filter for VLANs. This is required for VLAN trunk/access ports.
    • pvid=4 in the /interface bridge port means the specific port will use VLAN 4.
    • tagged=ether1 in the /interface bridge vlan means the trunk/tagged port is ether1.
    • untagged=ether2,ether3,ether4 means the ether2-4 ports are access ports
    • vlan-ids=4 means we are establishing a bridge on VLAN 4.

    Hopefully, this helps you set up VLAN trunking on a MikroTik CRS/RouterOS switch.

  • Running WPA3-Enterprise in my home network

    It’s no secret that by now, most home networks use WPA-Personal. Why? It’s a simple password. This included mine. Well, until today.

    I always wanted to try WPA3-Enterprise in my home network, at least on the SSID/VLAN for my devices (versus the rest of my family). The roadblock was FreeRADIUS not working with Samba and MS-CHAPv2, it was a permissions issue (I don’t want to pirate Windows Server).

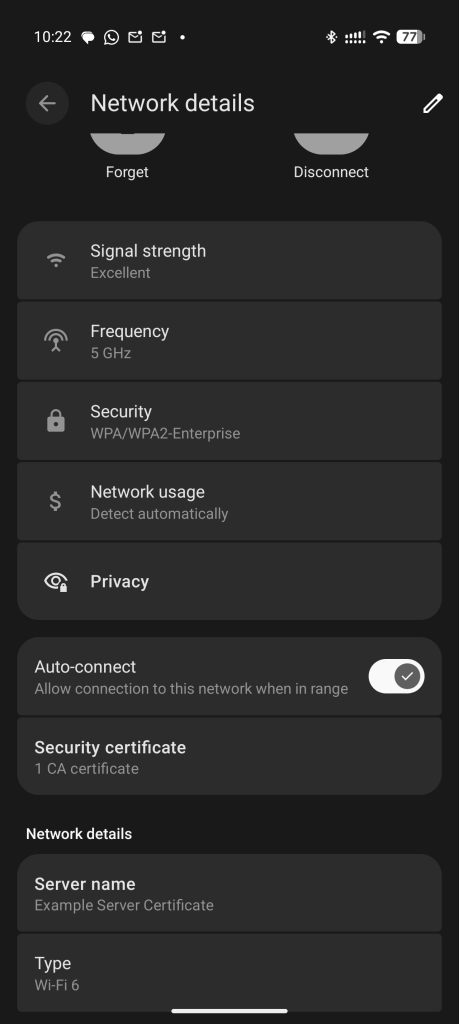
    So here’s me connected to my WPA-Enterprise on my phone:

    Why?

    While I know the reasons for WPA3-Enterprise in an office network, it seems overkill for a home network. So why do it?

    Because I can.

    It’s easy enough to do on a Incus UniFi controller. After all, I have a cluster of MikroTik 10G equipment when I could just rent an ISP-provided router and extender like a Joe and focus on “AI” instead.

    Well, I’m done.

  • Cloning a Calix GPON ONT or Quantum Fiber SmartNID

    WARNING: This guide is for instructional purposes only. I am not responsible for any damages caused by this guide. This guide may violate your ISP’s terms of service and is possibly illegal. Proceed at your own risk. I also no longer live in CenturyLink/Quantum territory.

    While I now live in Verizon territory (and lack Verizon FiOS at the moment), when I lived in Seattle and got CenturyLink Fiber (now Quantum Fiber), I initially had an issue which looked like “latency spikes and packet loss”.

    Little did I know that the ONT (Optical Netowrk Terminal) given, a Calix 716GE-I R2 has a hard cap of 16384 TCP sessions, not unlike AT&T Fiber/U-verse routers. Even lesser known is that it’s very easy to clone Calix ONTs with just a JTAG cable and the Calix 803G doesn’t have the issue.

    CenturyLink Fiber then got rebranded as Quantum Fiber which uses SmartNIDs and DHCP, and then sold to AT&T. However, I had a CenturyLink-branded service with a Calix ONT at the time and moved eastwards before I could be switched over.

    Note: This is not for AT&T Fiber itself using a Nokia ONT or BGW320/BGW620. I never had AT&T Fiber, outside of Frontier FiberOptic GPON in Connecticut for a few months which inherited 802.1X from AT&T. Check the 8311 Discord server for AT&T Fiber proper.

    So you want to clone your ONT?

    Pre-requisites

    You need the following devices information:

    • Original, ISP-provided Calix ONT or SmartNID with the ONU MAC and FSAN Serial ready
    • If required, your GPON Password. CenturyLink/Quantum doesn’t use this
    • Calix ONT being cloned to
    • JTAG serial adapter

    About the JTAG adapter, the CP2102 models are recommended. Other models have had issues with Calix’s JTAG console.

    Cloning the ONT

    Now for the fun part.

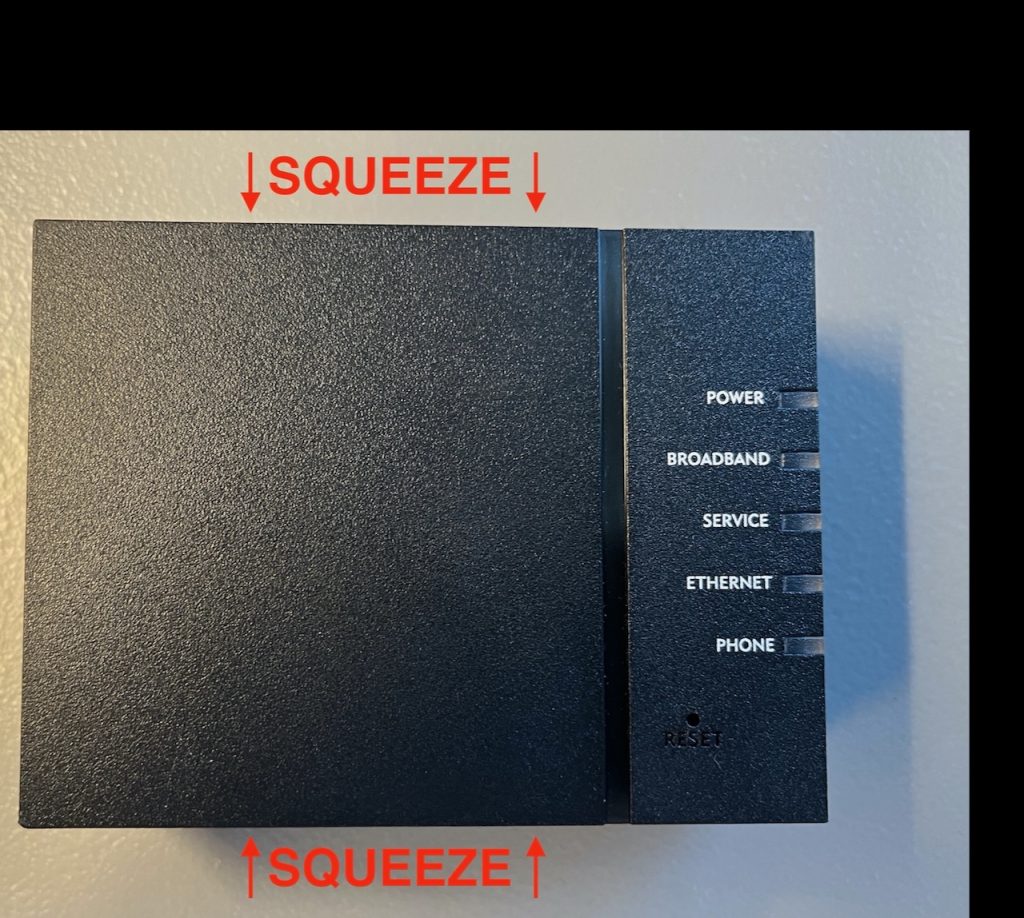
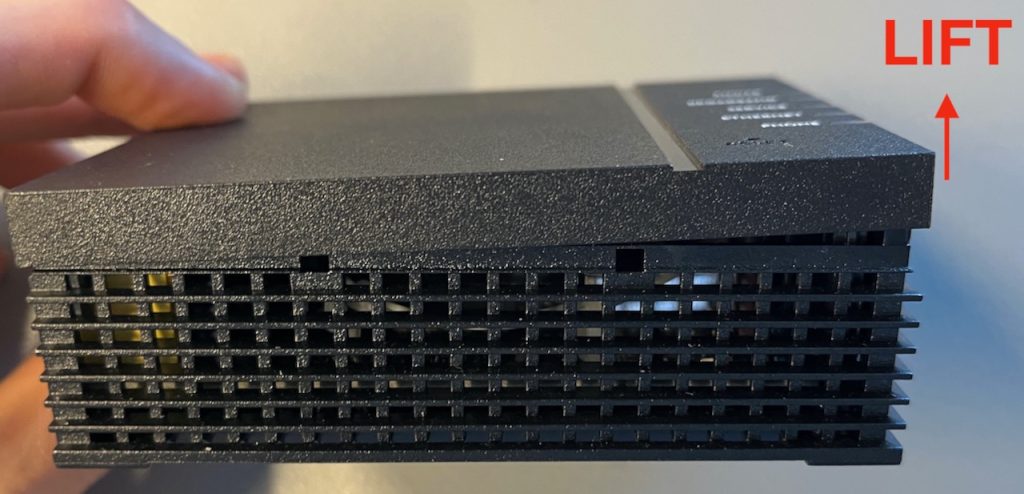
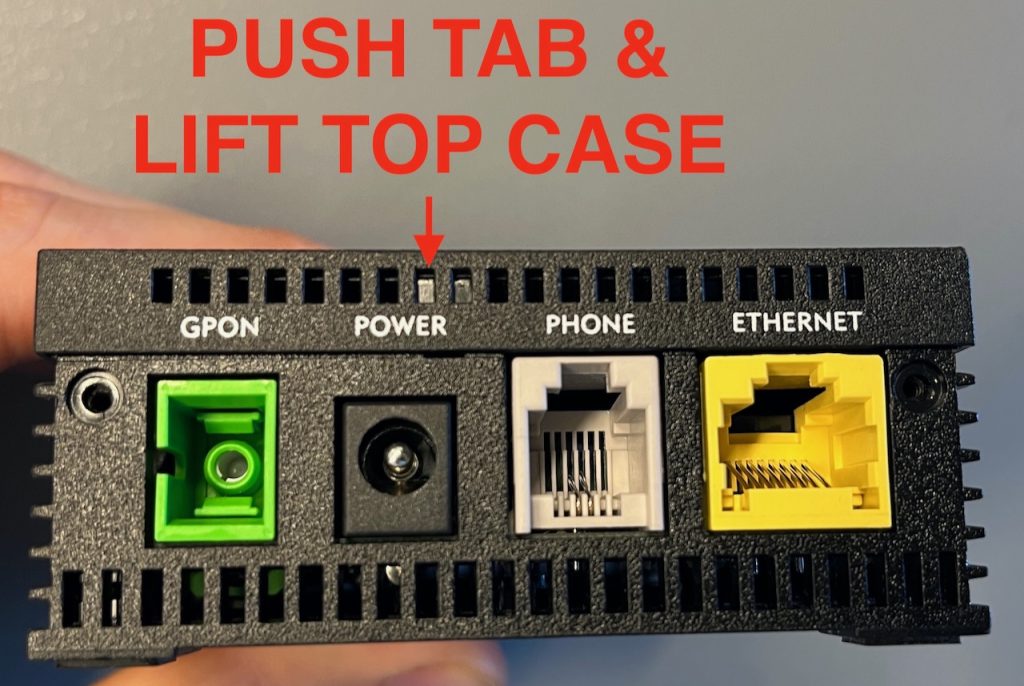
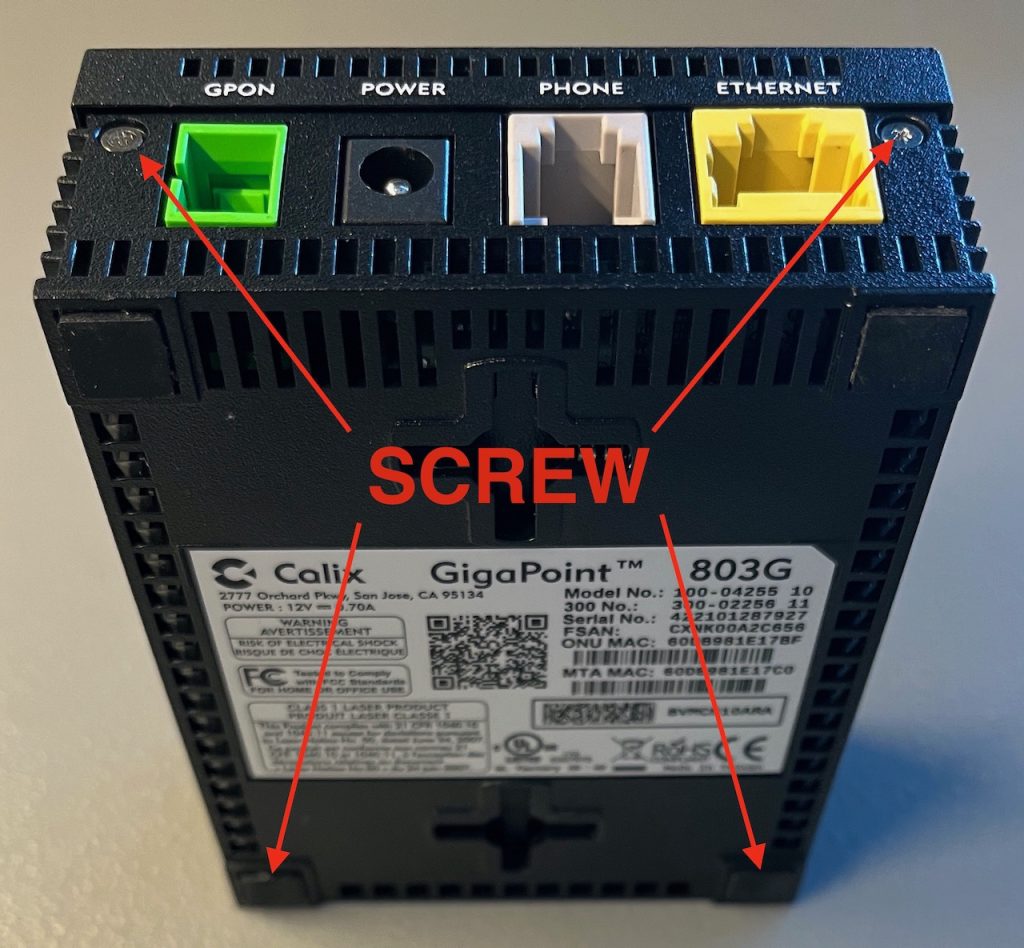
    First off, you need to open your ONT.

    For the 803G (the destination ONT), these images should be self-explanatory.

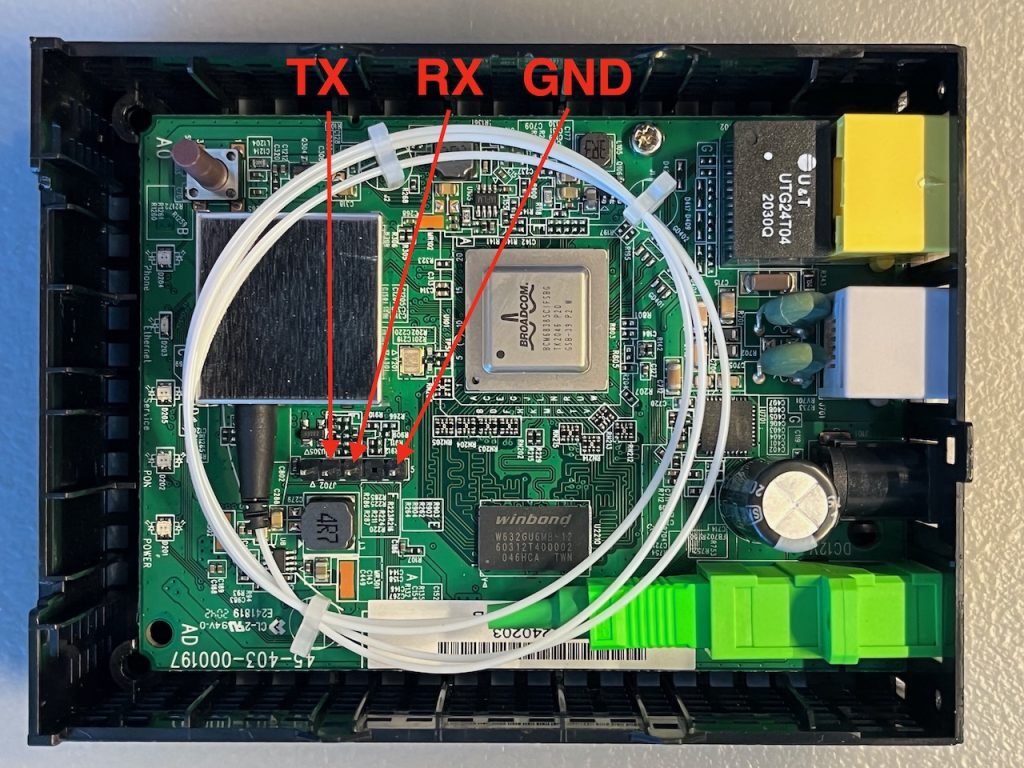
    When you are inside, connect the JTAG.

    Note: The TX should go to your JTAG RX and vice-versa.

    Image source: fire-foo.com.

    When you connected your JTAG header pins, open a serial console (e.g. cu or PuTTY), plug in the power while hitting ESC on your keyboard repeatedly.

    When you are on the CFE> prompt, type b and press enter.

    Press enter for most of the values, except the Base MAC Address and GPON Serial Number which should be the ONU MAC and FSAN Serial respectively from your source ONT.

    Some ISPs may need a GPON password, but CenturyLink/Quantum does not. I do now know how to get the GPON password as I was never in that scenario.

    Once you are done, wait for the ONT to boot successfully, then turn off the power, close the ONT, and plug the fiber and power in place of your stock Calix ONT.

    An example of a JTAG session can be seen here.